O Gauge Modelling on the GWR
A personal Journey
Bradley Manor 4-6-0 Body construction
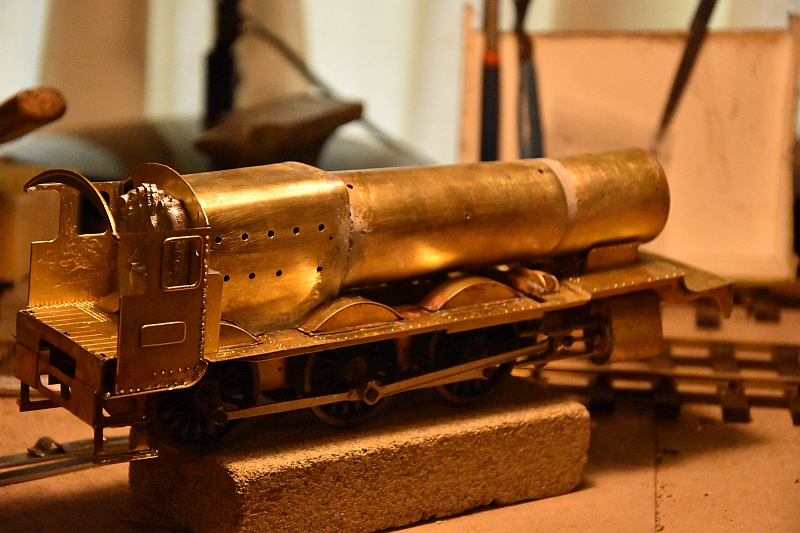
Next its time to play the ‘lets roll the boiler game’. So called because the boiler of the locomotive is in three separate parts. The front smokebox end is a straight forward cylinder, the central main boiler part is a conical piece and the third is more like a cube with round corners, (that is the firebox end).
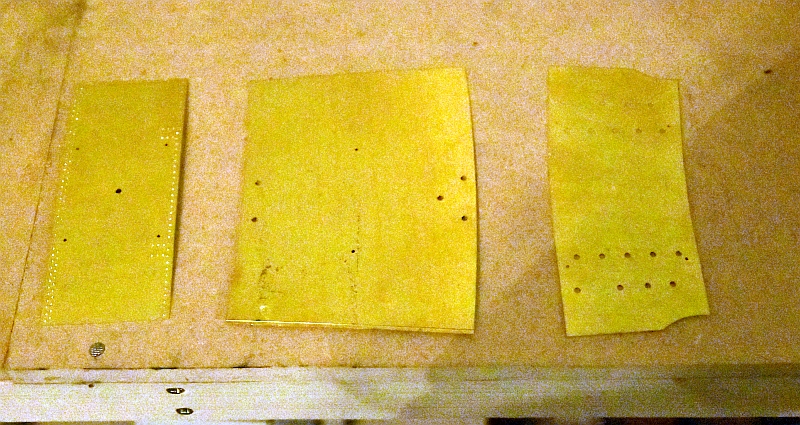
To connect all three together there are cast or pressed brass formers, the total number of pieces
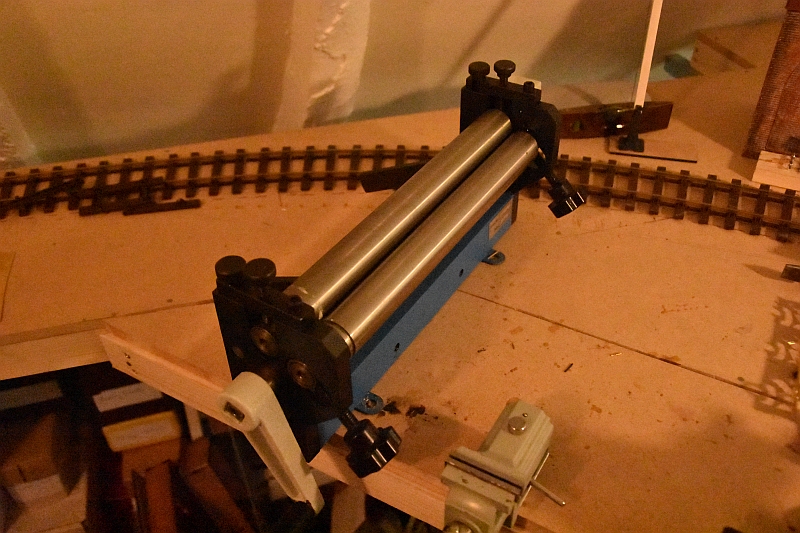
that need to be aligned being 7. To help with the rolling I have a special roller machine.
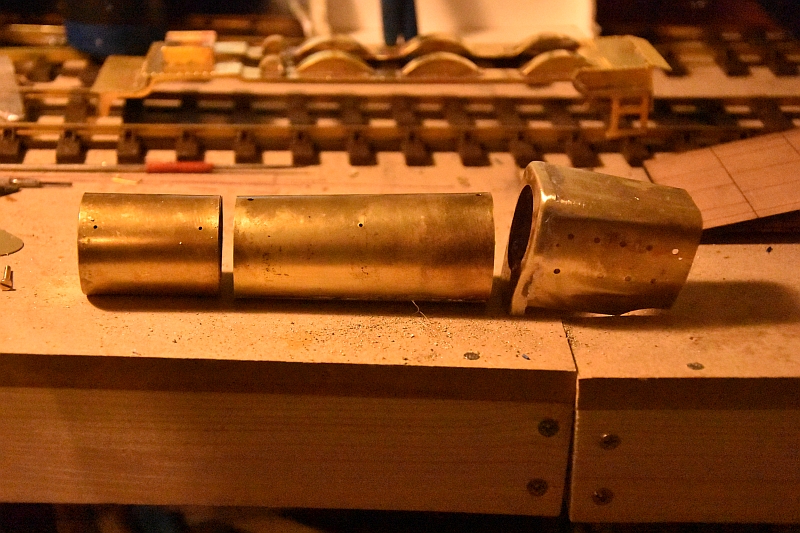
The three main parts are now rolled and soldered ready to be fitted together. Great care is required to get the parts straight and square and sitting on the running boards correctly
A certain amount of fettling will be needed to
get the firebox to sit squarely between the rear wheel splashers.
The front of the fire box fits too far down into the wheel area and
needs ‘sculpting’ to give clearance for the wheel sets to revolve
without touching the running board and boiler.
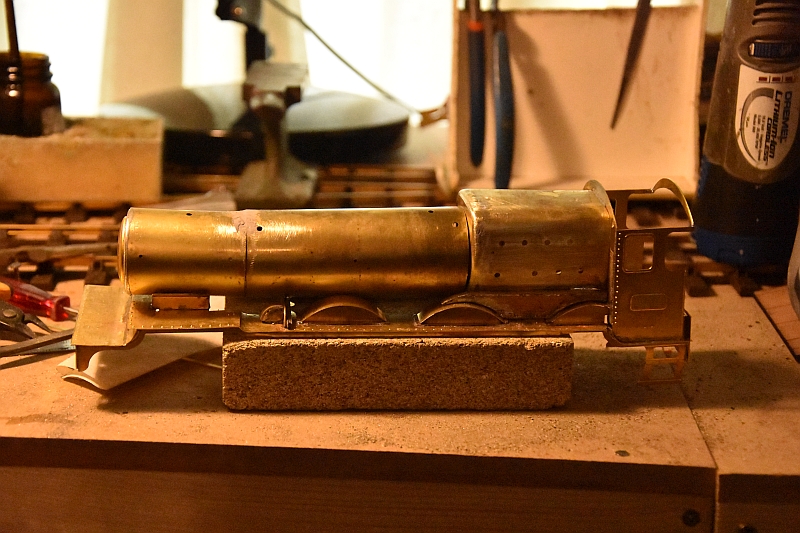
That having been done the boiler now sits on
top of the running board and the chassis meets up underneath it
without fouling. The front and middle of the boiler are now as one.
The whole arrangement is now ready to be soldered together and
filled where appropriate to give a smooth finish ready for base coat
spraying.
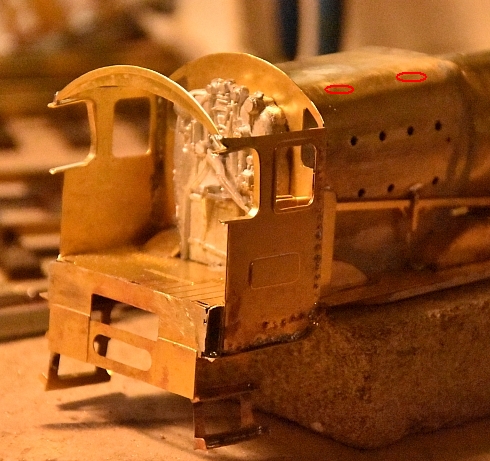
. The cab detail and window frames need fixing in place as does the reversing connecting rod and bracket. Just noticed that the firebox lifting brackets are missing from the kit so will have to cast my own. They sit on the top curve of the firebox and are quite prominent, (shown in red).
The firebox lifting brackets have been cast and put in place, as has the roof and handrails of the cab. The reversing rod and brackets are also now insitu.
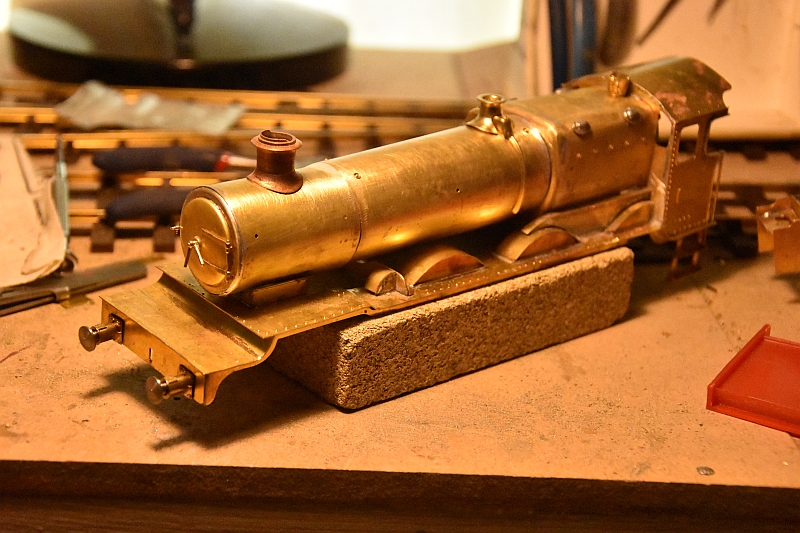
A few finishing touches to the body. The
chimney, pressure valves, boiler low water plugs, front buffers and
whistle all put in place. Boiler front detail also added including
the valve for the boiler washout lance, (really tiny).
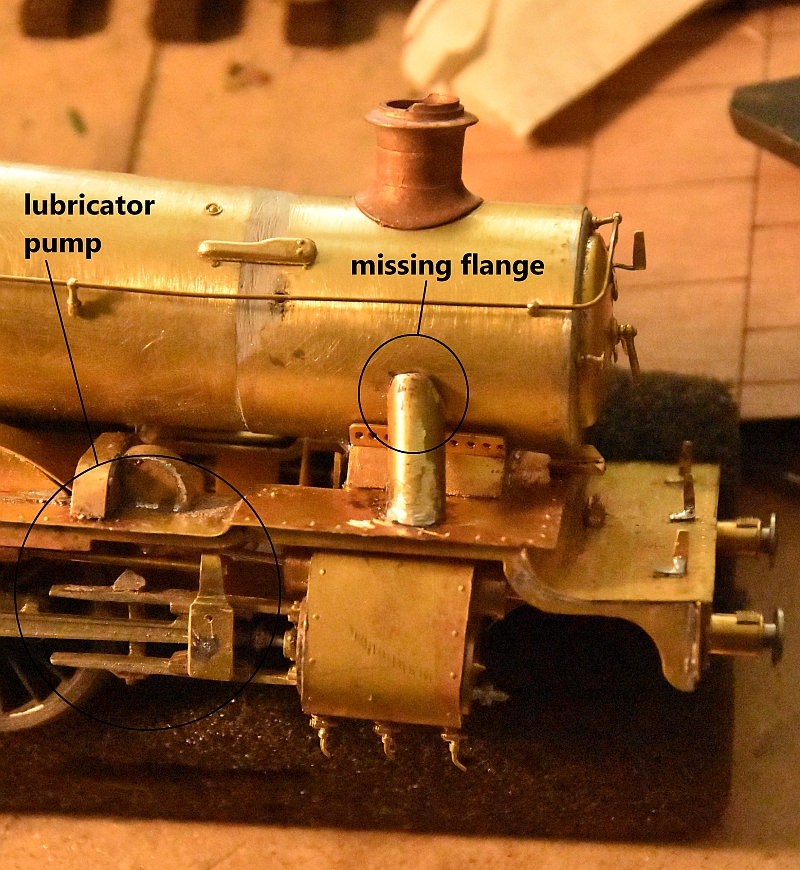
A flange on the smokebox pipes from the piston
chambers and a lubricator pump on the footplate need to be added.
The flange is quite prominent and a special bracket has to be made
up to work the lubricator as shown here.
Now with the flanges and pump fitted. The brake framework now needs applying to the chassis. The framework is rather complicated. It’s unfortunate in one sense that most of it is not on view and also will be painted black making it almost impossible to see. But that’s to my advantage as I usewire to create the rodding. Then fix the brake arms loosely to the chassis, (holes are in the wrong place unless you seriously cut down the brake shoes) and arrange them accordingly .
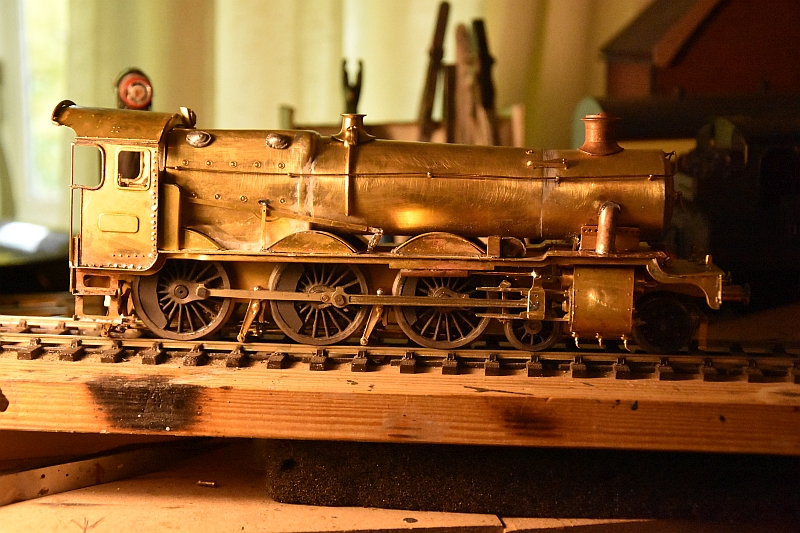
Here the brake shoes and framework are in
place. The brake shoes themselves almost come down onto the rails so
care is needed in putting it all together to allow for clearances
and avoid electrical shorting. This may even be a problem later on
if the track work is undulating. So to avoid this I re-drilled the
swivel holes for the brake shoes a little higher to give clearance.
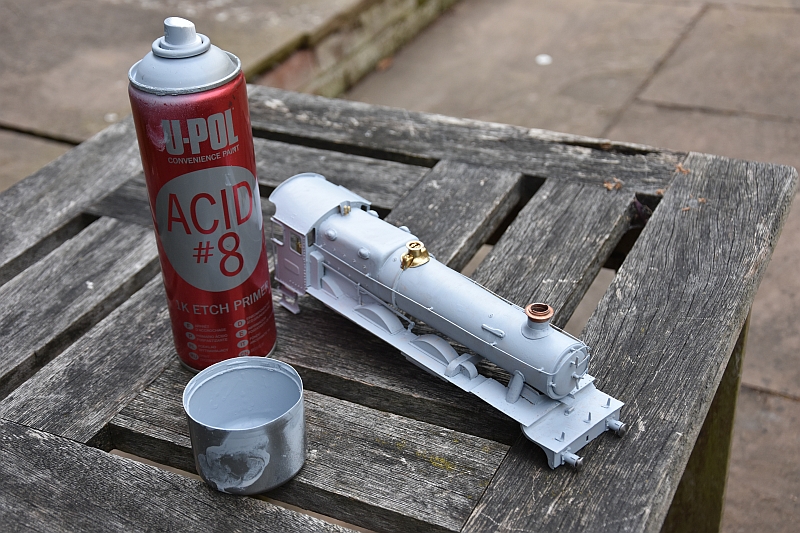
Time to paint the body with etch primer. I
prefer to paint and not spray it on as it is useful in filling small
gaps and smoothing out ridges if you are careful.
Guidelines
construction ideas