My O Gauge Journal on
Modelling the GWR
A personal Journey
Lining the tender
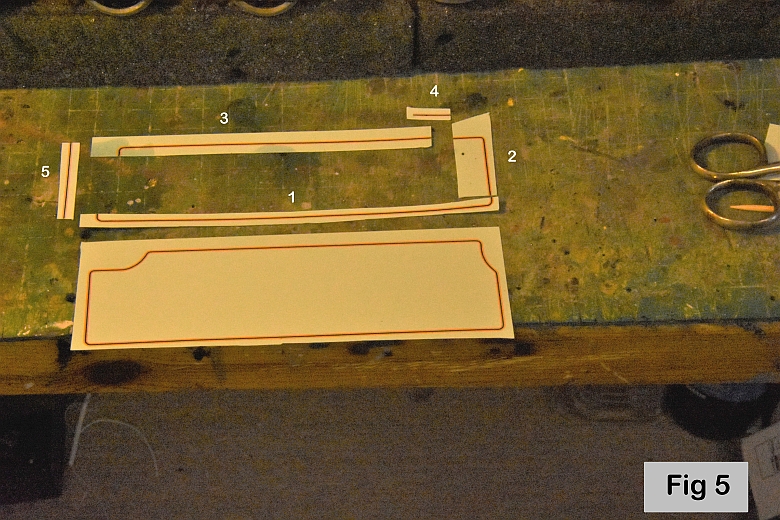
Lining the tender was somewhat easier in one sense, but more of a
challenge as there were long straight sections to get right. Fig 5
shows how the transfer was cut up into several pieces and the order
in which they were to be applied. The shape of this transfer is for
large tenders whereas the City has a small tender. But cutting the
transfer carefully allowed me to match up what I needed to line the
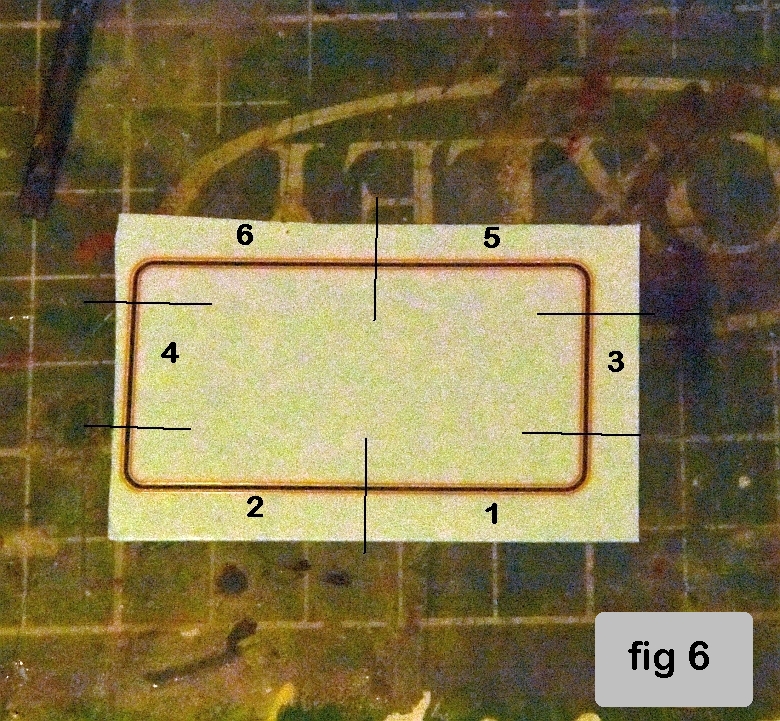
tender. The rear of the tender was also a smaller than the transfer
I had so that had to be cut up to make a smaller frame. The cuts are
shown in Fig 6 and also the order in which they would be applied.
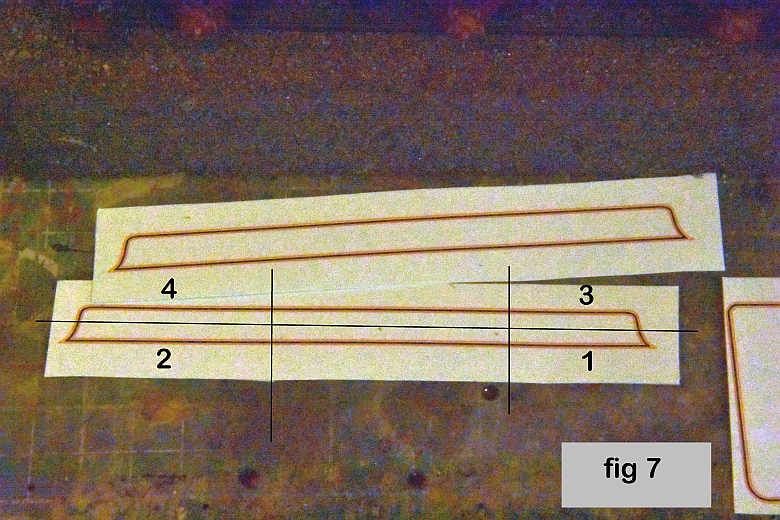
The top parts of the tender were also too long
and were cut down, (Fig 7). Each side being cut into four pieces.
The middle pieces being discarded.
So one thing I have come to know is even though the transfers are the right shape they may well need cutting down in some way to sit properly in their respective places. Do not assume that they are the right size.