O Gauge Modelling on the GWR
A personal Journey
The Creamery
I'm totally amazed that very little attention is paid to this area of railway modelling. Many books on the GWR give passing acknowledgement to the fact that a tremendous amount of milk was mobilised across its tracks but nothing more.
For example 'Edwardian Enterprise 1900 - 1910 by Swan publications has reference to milk rolling stock on four pages three of which are pictures of a Siphon C, a full page picture of a milk train of 'open siphons' and a cameo of Paddington station with milk churns being loaded into what looks like several siphons, but no mention of the extent to which the GWR participated in mobilisation of milk to a thirsty population!
A little better is the book 'The Golden Age of the Great Western Railway 1895 - 1914' which explains that Paddington had a 600 ft platform built especially for the offloading of milk churns. It goes on to say that as early as 1896 20 million gallons of milk was brought into London each year and as such earned the GWR a considerable revenue. By 1914 the GWR was still having problems shifting large volumes of milk and in a 12 hour period 33 full truck loads and nearly 400 churns was delivered from ordinary guards vans on ordinary passenger services. Empty churns were also a problem where in 1913 it was reported that 4,890 empty churns were unloaded at Paddington.
The Southern Railway were said to own 1Million milk churns!
There's a nice description of how milk traffic developed here but I can't vouch for its accuracy although it seems a seriously informative and correct site that deals with all things railway.
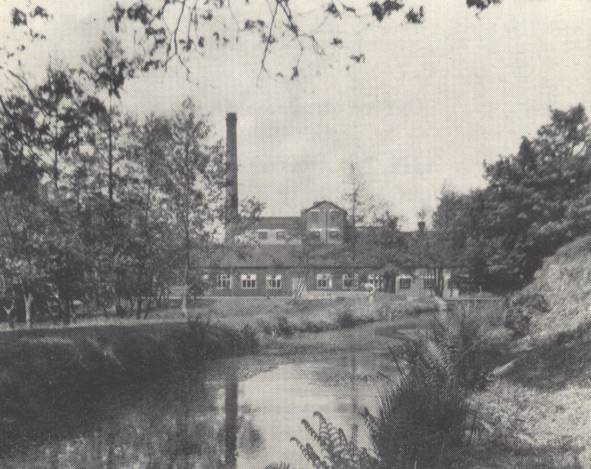
But in spite of all this there is little to see of the buildings and places from whence the milk was collected and charged to tanks and churns for the railway. One exception is the materials on the Culm Valley line. There are several publications about this light railway and of Hemyock at the end of the line that housed a dairy. But all photographs of it in these publications are from afar.
So here is a new project begging to be investigated and built. I got in touch with Chris Smith of Invertrain and we have been working on a structure that will grace my layout. But more on that as it develops. How it started and developed follows.
 |
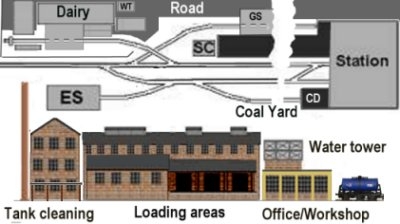
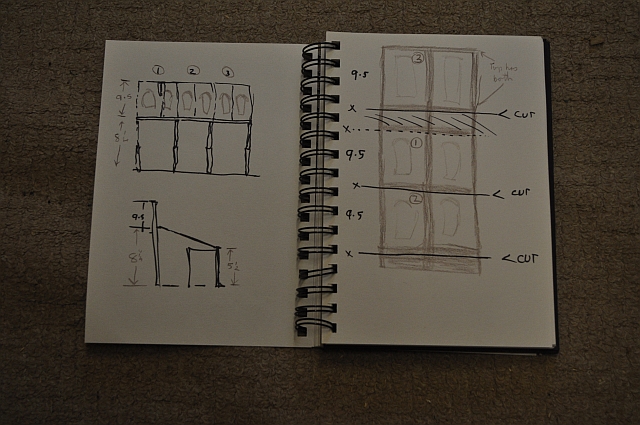
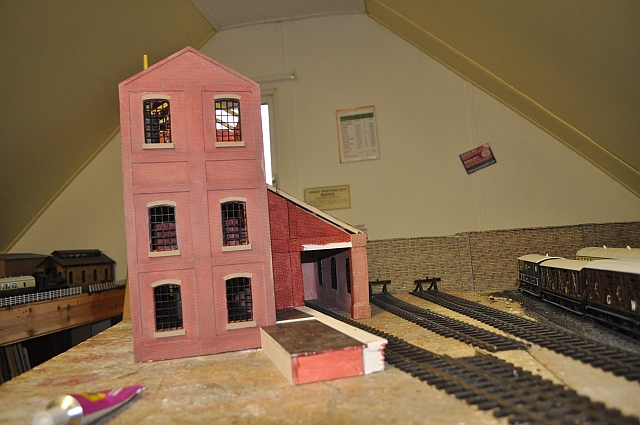
Filling in some space on the new extension became relatively easy once I had decided on creating a 'creamery'. I already had a milk tank from Slaters and am purchasing a couple more from other sources. The information on creameries or dairies is less than helpful on the Internet but I have compiled a plan for such from a drawing left, (sourced from the site mentioned above), and created a mockup building below from this rough plan. Already I'm thinking that the small building to the left will be omitted as it conceals what is going on inside the large building and its platform. Site viewpoints are very important and this will block out most of the interest if i'm not careful.
 |
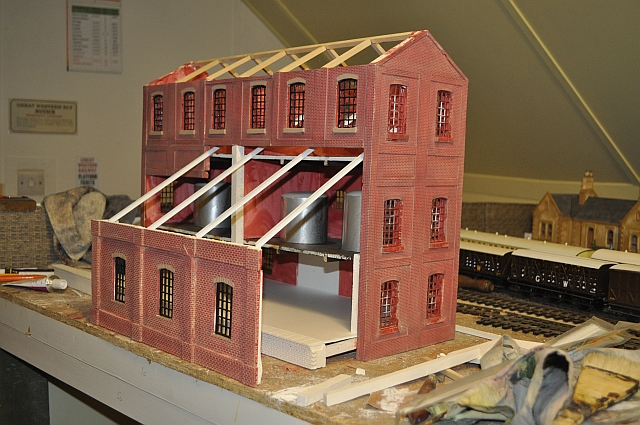
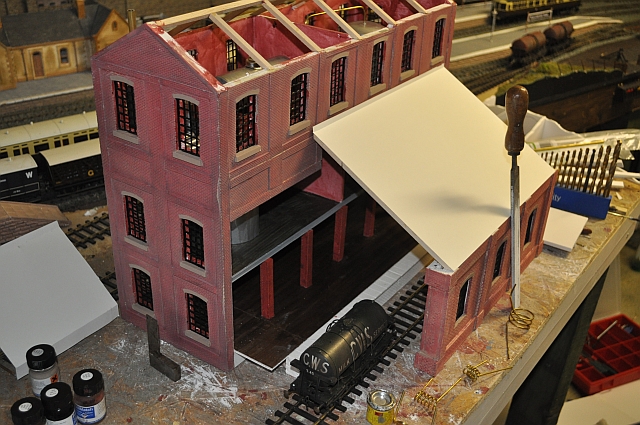
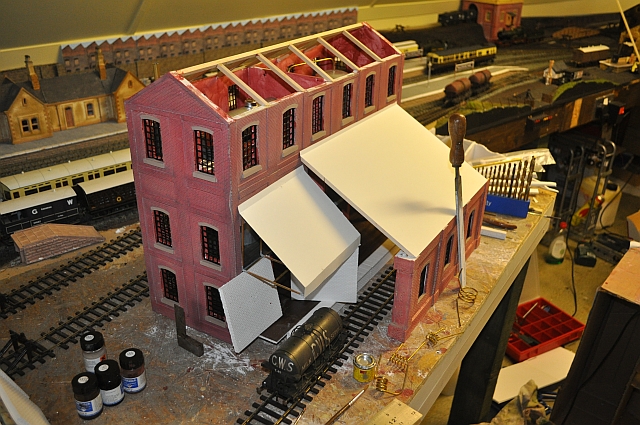
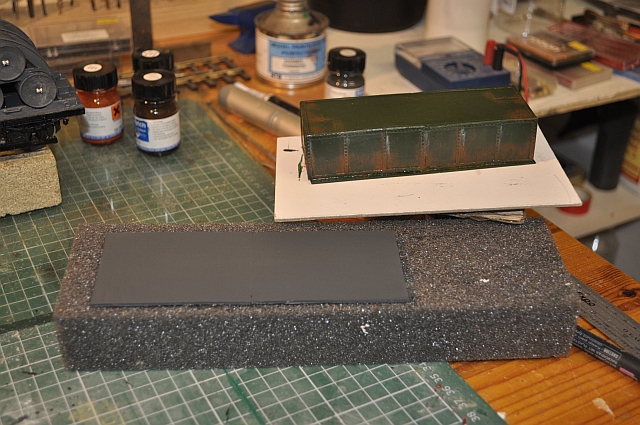
Its fairly important to make a mock up of the buildings first to assess the 'look' of the finished items as already mentioned and now I have reduced the number of buildings down to the main dairy, offices and storage tanks. A water tank will be built in the vicinity though, (could be separate of on the roof of the large building). The mock up is a reverse of the picture above.
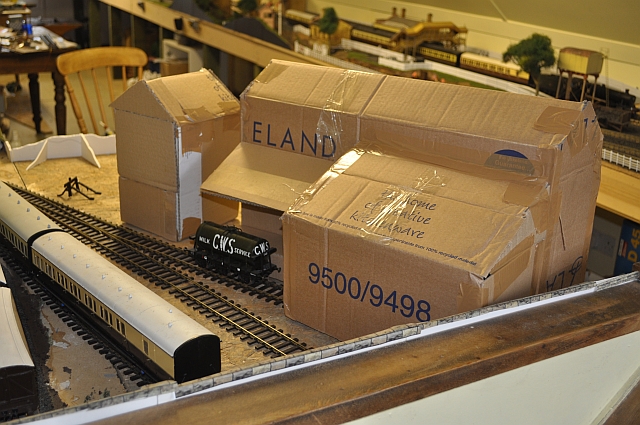
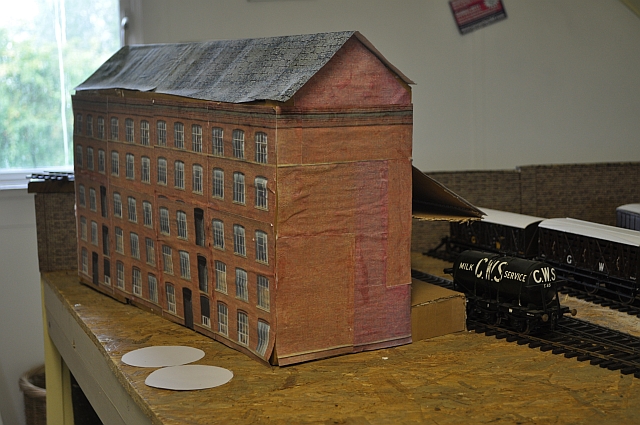
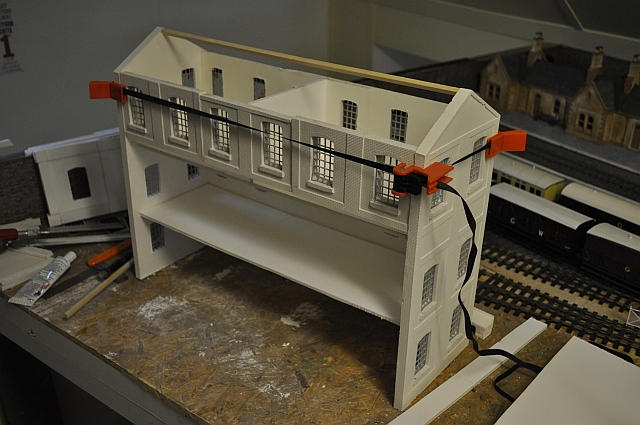
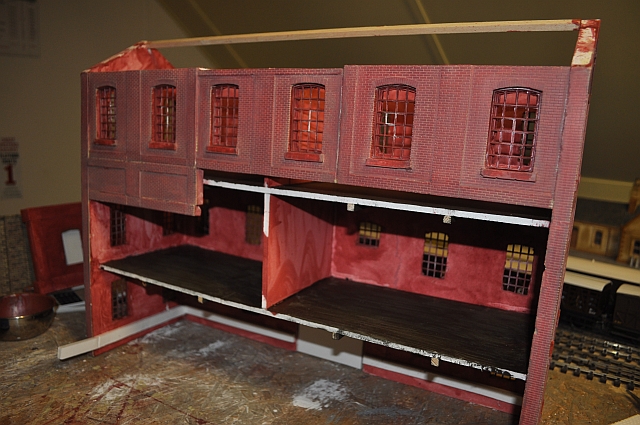
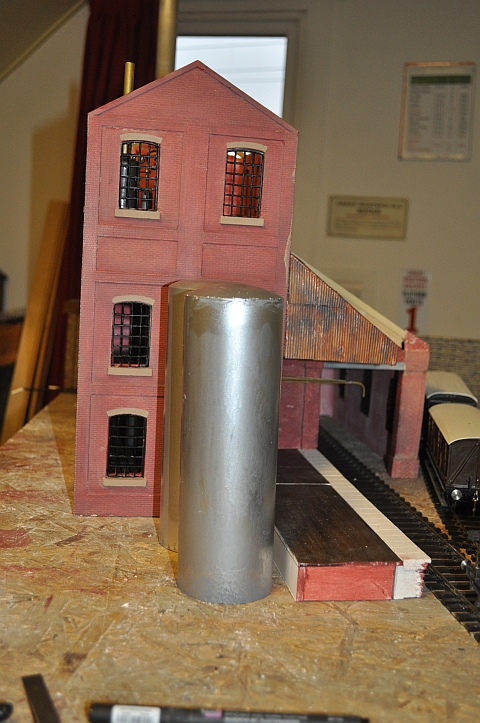
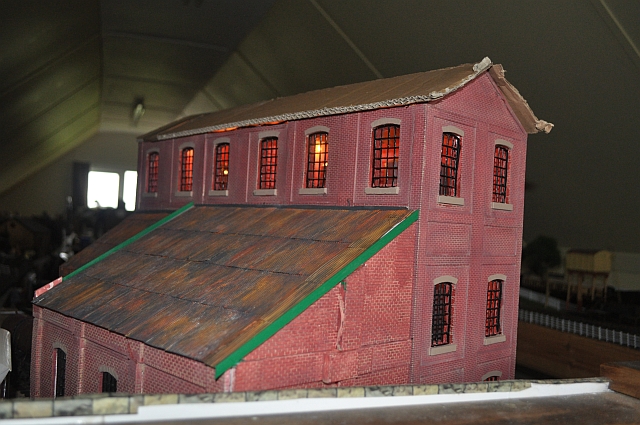
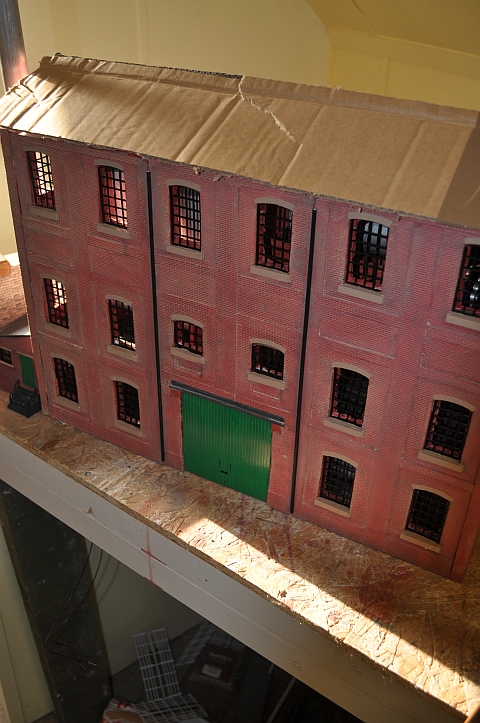
| Here is the mock up with a paper covering to see what the finished item might look like. I've decided that there will be a chimney and boiler house against the nearest wall on completion. |
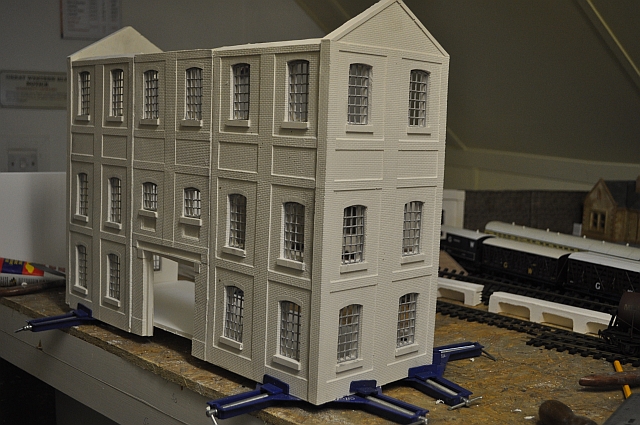
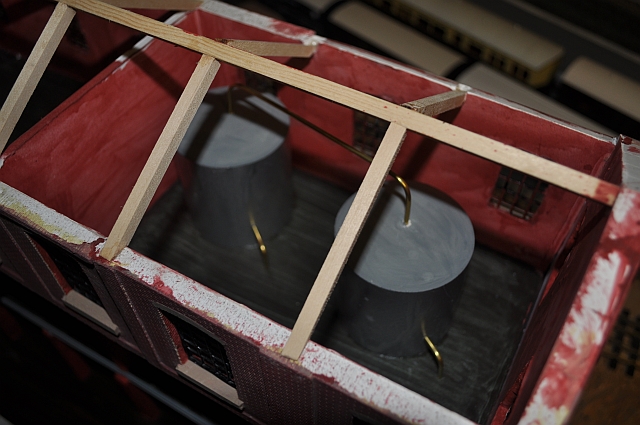
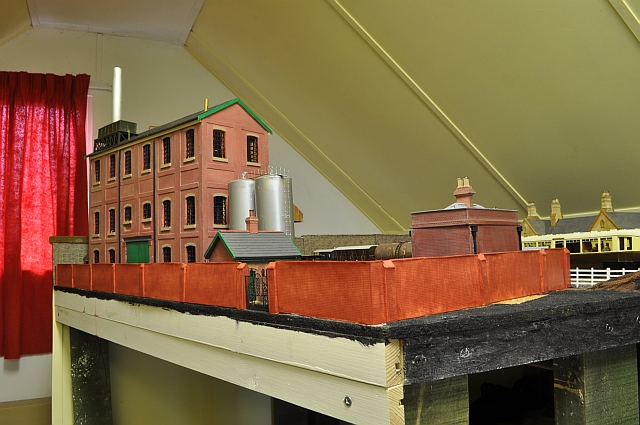
 The building when finished will be three stories high and as you can see from this view, most of the interesting bits will now be in view. The two circles are marking storage tanks, there may be more as they usually appeared in pairs of 6 or 8 etc depending on the size of the unit. I have a photo of the storage tanks at Adnams brewery Southwold to use as a guide, (what better place to get ideas from and the beer is good too!) |
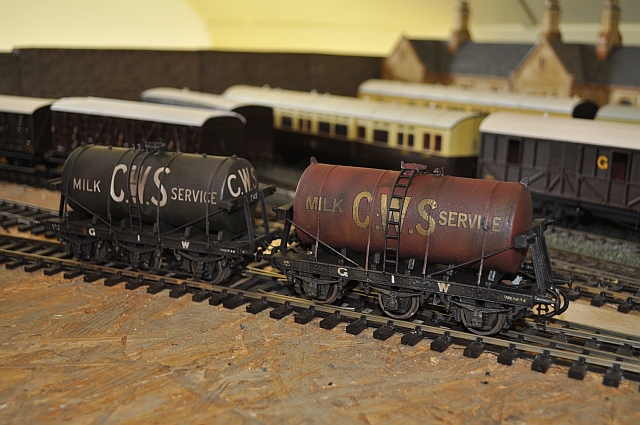
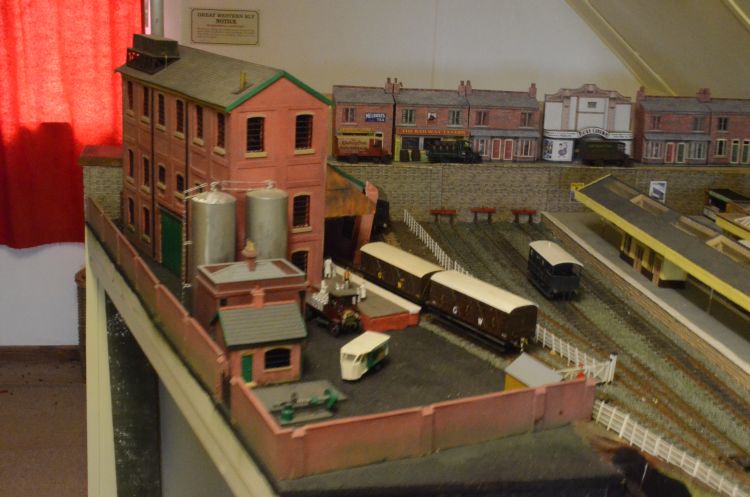
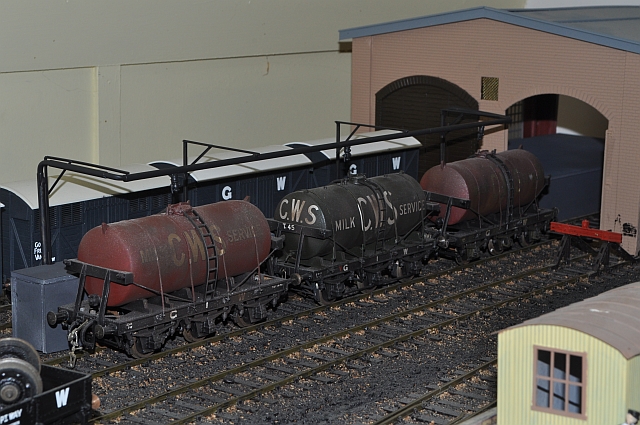
 The finished models will fit nicely beside the station area and complete the design I had in mind for this large terminus. Work on the covered section is underway and the large building sections are on order. I will be deciding what type of roof for the covered section will be appropriate once the main structure is in place. Just finishing off the second tank so there will be three tanks and two browns full of churns to make up the train, but more on that later. |
 |
 |
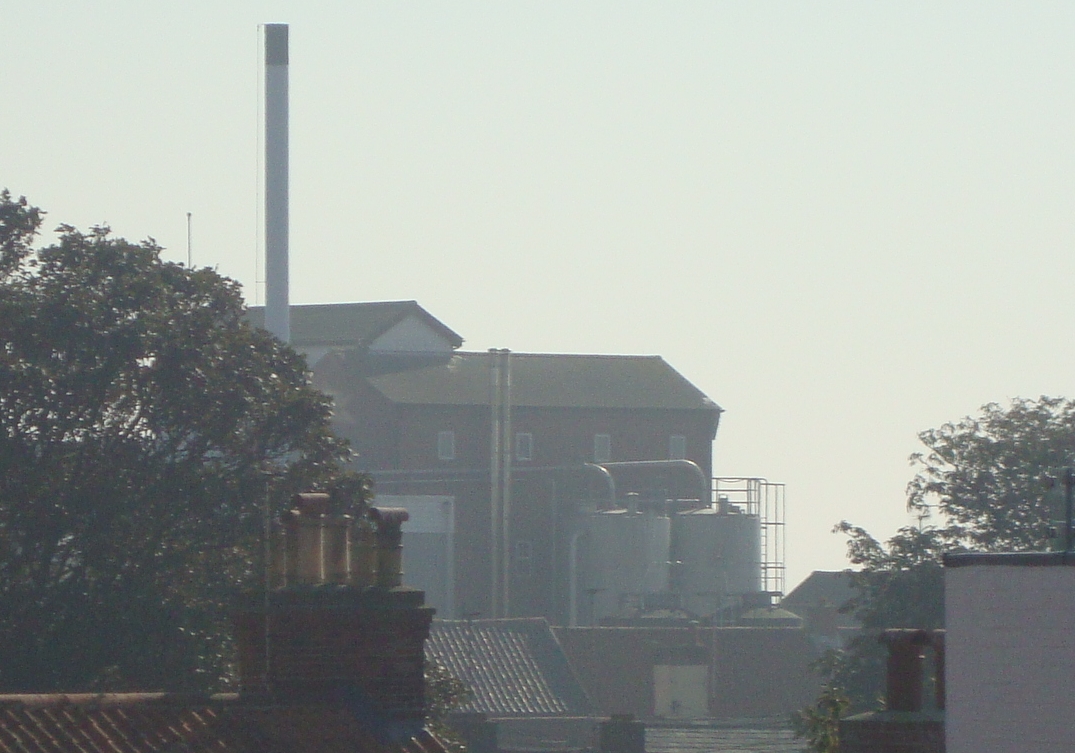
Not much to see, but the storage tanks are nicely situated at the back of Adnams brewery in Southwold. Just as they will be in my creamery.
My storage tanks will start life as down spouts but more on that later.
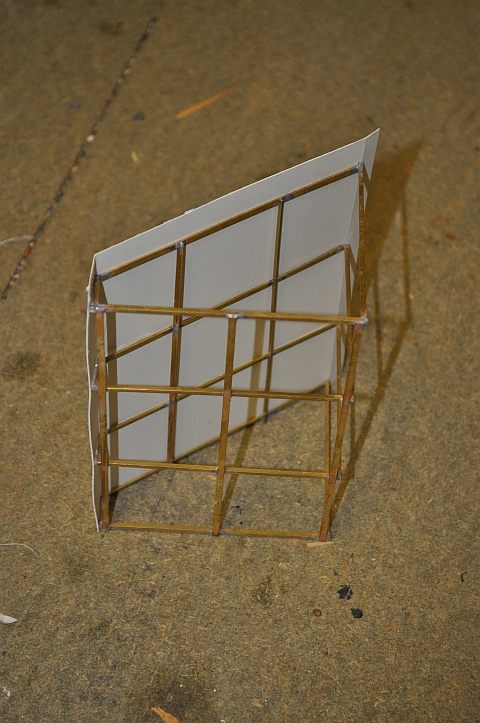
 The bits for the side wall of the lean to have arrived and been glued together and filled in with plaster ready for the front and back parts. As these walls are all made up of components a backing paper is necessary to help hold everything together. |
 |
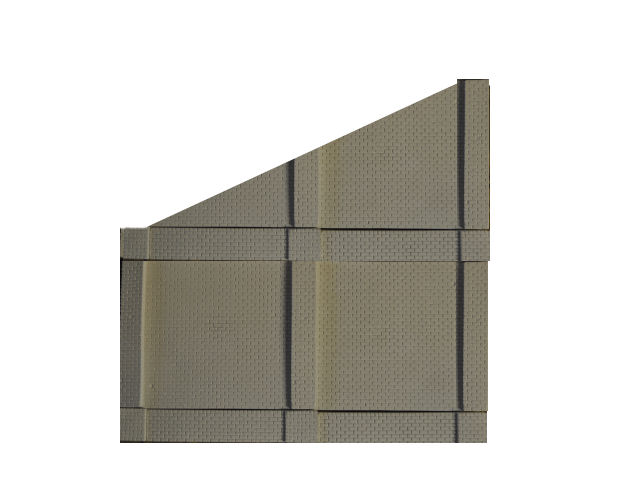
Here are mock-ups of the front and back wall sections of the leanto. This will complete the lean to structure and the size of roof can then be calculated. The main building will be fixed to this lean-to and a platform will be created both inside and outside
 |
 |
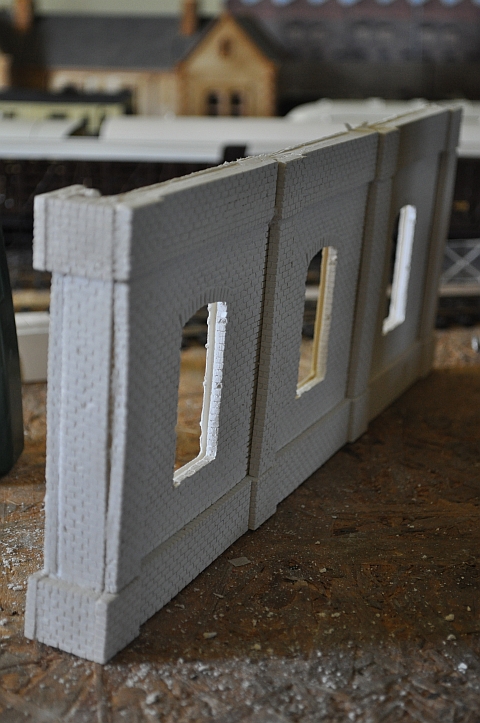
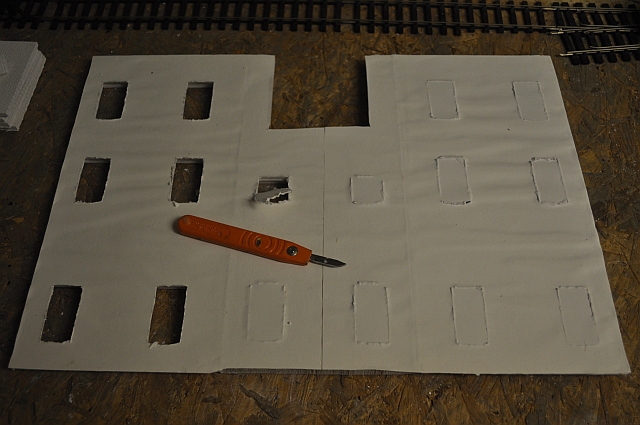
I now have some of the walls of the main building. I
intend that the length of this building will be made up from three sections.
Unfortunately they are not designed to 'fit' together in a modular way as they
are described as frontages and as such have buttresses at each side. fortunately
I have a powerful band saw with a fine blade and used this to cut the excess
buttress pieces off the main plates as shown in this
picture.(The door section is only available as and end piece so the roof
was removed at the same time. Wear a mask if you do the same or provide
adequate ventilation as the dust created is significant and can harm
your breathing.
Each piece comes with white metal window frames and I now have enough to
build the main back wall and sides of the main building. my mock up was 22" in
length and the panels are only 7" wide. With the removal of the buttresses this
brings the total length of the back wall including the end piece thicknesses to
20.25". So no problems there
 |
Two important items here. The back wall has been stuck to cartridge paper and filled in between each section. after 24hrs it should be solid. the paper can then be cut away from the door and windows. The three pieces of made up plasticard will act as floors and strengthen the whole building. Cut to the right length but a little over size for depth which can be adjusted once building commences.
 |
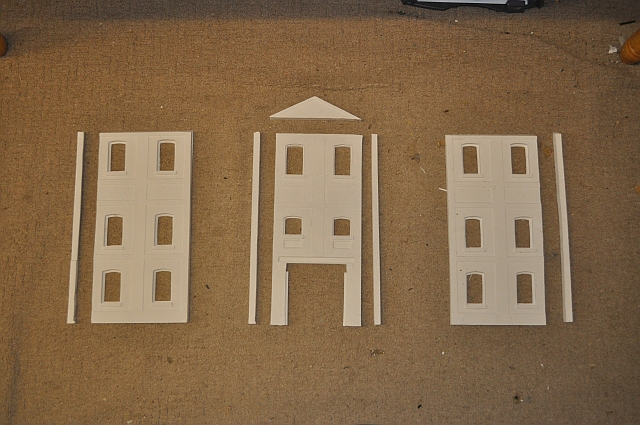
The remaining side I have can be cut into three pieces to provide the top row of windows. The remaining wall will be in filled with doors or left 'open'. There is also a canopy covering the outside section in front of the lean to area and this is where the platform juts out alongside the track.
 |
Having stuck the sections to cartridge paper and allowed it to dry over night. The window spaces in the paper are cut out.
 |
All the white metal window frames had to be fettled into their openings and then the walls were carefully positioned with corner clamps and a floor piece inserted to give strength to the structure. These floor pieces have to be shaved to fit and add strength to the building which will be fairly heavy.
 |
The top front storey has now been glued into place. This will carry the lean to roof for 2/3 of its length then I will be constructing the openings and platform, (which extends the entire length). The ground floor will connect with the platform edging and hence be the same height. For this I will be using a thinner plasiboard.
 |
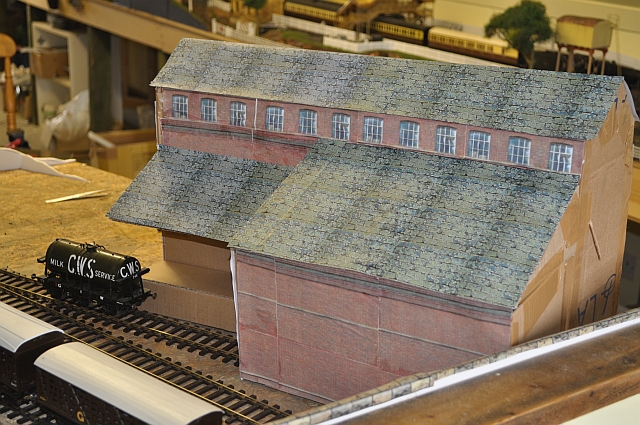
The first coat of a mixture of Indian red, rust and dark brick with liberal amounts of thinners has been applied. Window frames will eventually be black and the floors brown. There are false beams under each of the 1st and 2nd floors. A second coat of paint will be applied to the brickwork and then a wash of cream to fill in the mortar areas between the bricks.
 |
The main building has floors to the first and second floor as mentioned above and in this pic you can see the beams protruding. Also, the lean-to wall is positioned to see how the platform will face up to the railhead and the pitch of the roof. It has been suggested that corrugated iron pieces would have made up the roof rather than slate and I'm inclined to agree so that is being investigated. What goes inside the main building remains to be a mystery at the moment. but I'm working on that. watch this space!
 |
A second coat of dark brick to all the external walls has been
applied. The remaining coat of mortar is next on the list.
The doors have been resized painted green and placed as shown. This
completes the structure of this back wall. But all the window frames
will need to be painted black. This is a laborious job as there are
about 34 windows to do. I won't be putting 'glass' in them as it makes
it easier to see any internal details. I am researching what potentially
might have been inside and this will be documented as well.
 |
The mortar has been applied and the brickwork rubbed down to give a lighter effect. You can see the floors have been painted brown and the internal rooms now await tanks and pipes. The ground floor will incorporate an extension to the platform and then pillars and sliding doors. there will be two canopies and I have the corrugated ali sheets that will make up their covering.
 |
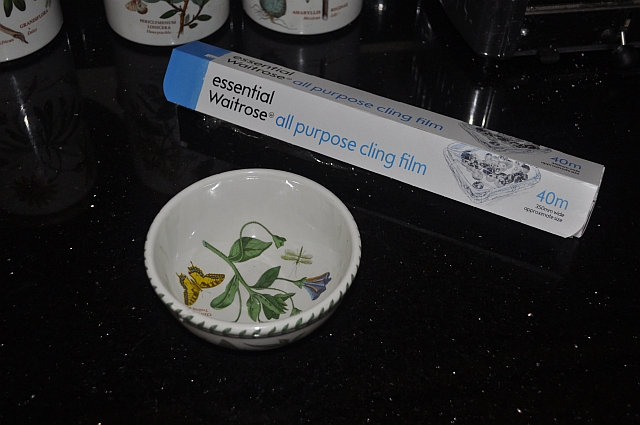
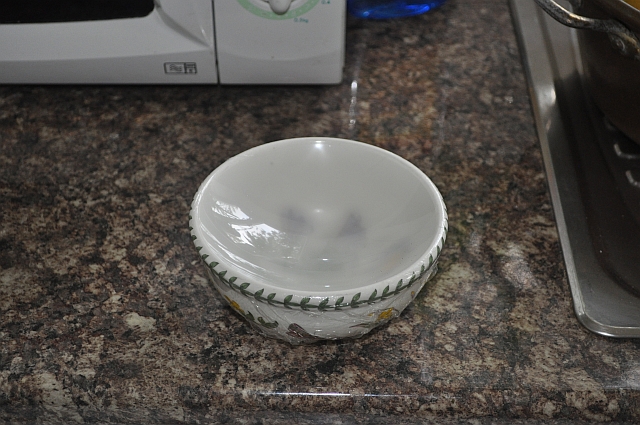
How to make a dome for your storage tanks
The tanks in the building will have domed tops. they are made up from downspout plastic pipe. To achieve the dome I used the well tried cobbled approach. This means using the best Portmerion bowls, Clingfilm and a microwave oven.
 |
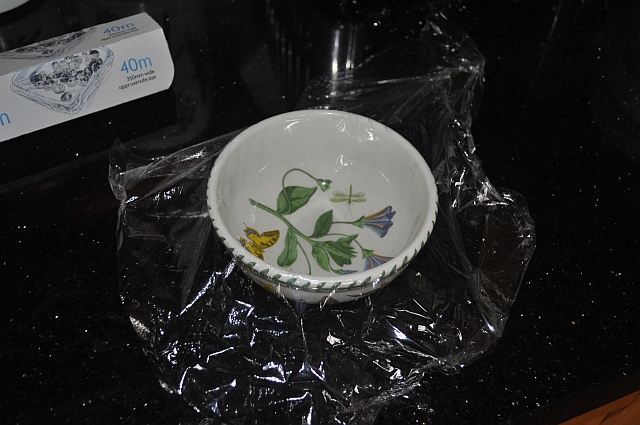 |
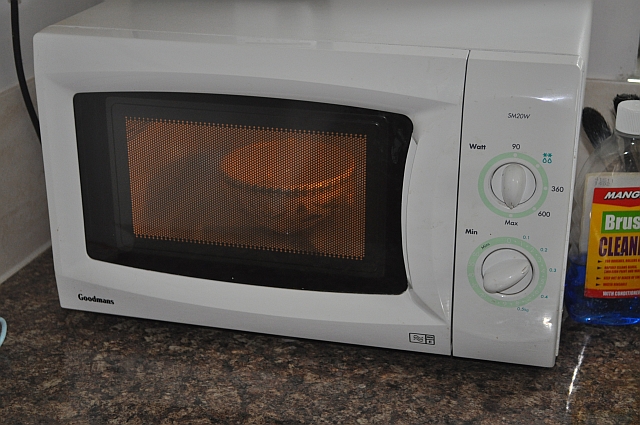
A little water is dropped into the bowl. The Clingfilm is stretched over the bowl and then the bowl is placed in a microwave oven. The microwave oven will heat up the water producing water vapour and making the Clingfilm literally 'cling' to the bowl and expand up into a dome. After about 60 seconds remove the bowl from the microwave and allow it to cool. As it does so the water vapour will condense sucking the clingfilm down with it into the bowl. This results in a smooth covering for the bowl.
 |
 |
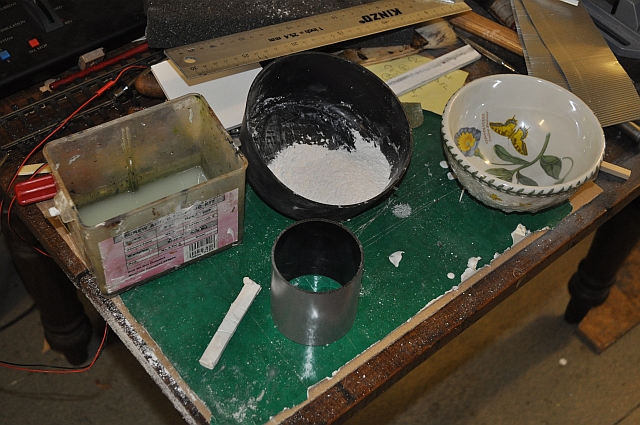
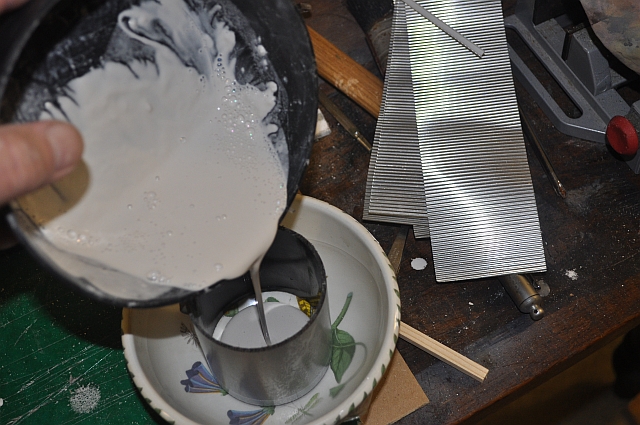
I used the usual mixing utensils etc to make up a paste of plaster enough to fill the bottom of the tank. Place the tank inside the bowl and pour in the plaster to a depth of an inch. Allow to dry. As the Clingfilm provides a smooth surface its easy to lift off the tanks with its plaster end when set. If you are careful enough the mould can used again, if you are clumsy like me just start again with fresh Clingfilm!
 |
 |
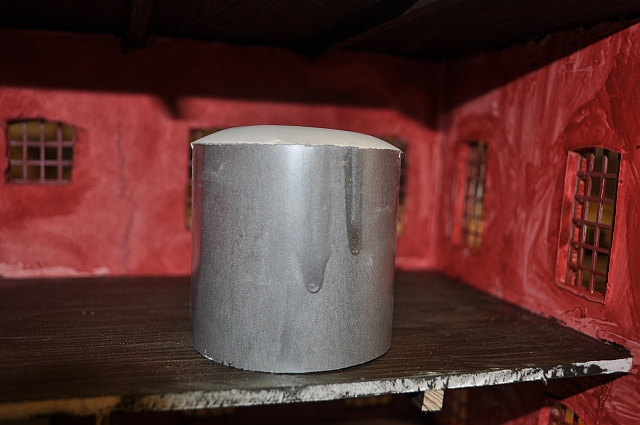 The finished article ready for painting. |
Some of the 34 windows have been painted and the sills and headers
have been painted as well.
Here I have placed the lean to wall for a mock up.
 |
 |
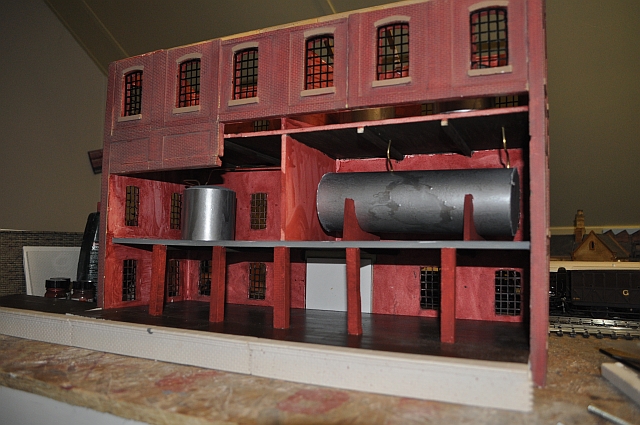
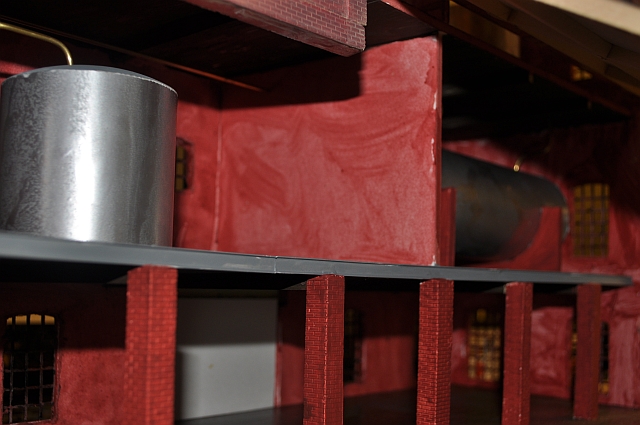
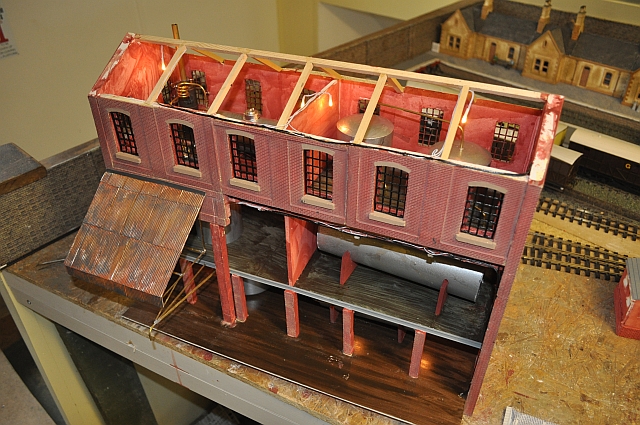
There's nothing worse than a factory building that's empty! So I put all the tanks I made to good use. These two pictures show the middle and top floors containing storage and processing tanks. Pillars have been added to the ground floor as this will aid the roof and lean to structure once that commences
 |
. |  |
Getting the roof for the leanto and the canopy right was done as
follows. The leanto as a big roof needed a sound foundation on which I
will stick 8' x 4' sheets of corrie, (scale size of course). So I used
6mm lime wood stuck with PVA to cartridge paper. This has been trimmed
and a 10mm piece left on the upper edge for a lead flashing against the
wall.
The small canopy was constructed out of brass lengths of 'L' shape
girder and rectangular extraction and then the roof part covered with
cartridge paper again.
 |
 |
This is how they look in a propped up condition. There will be a partition wall between the two and then more detailing of the ground floor with pipes to fill/empty the milk tanks.
 |
 |
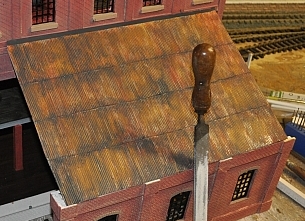
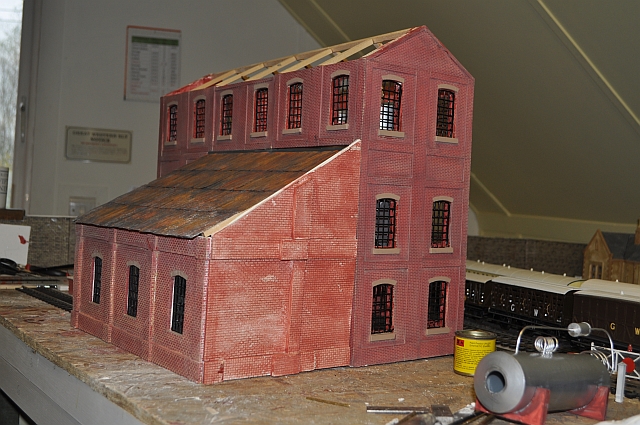
Having stuck numerous 8' x 4' sheets on this roof and the small canopy I tried to weather it using light rust, brake dust and cover that with dry brushed grey. The result is a pretty acceptable rusty roof.
 |
 |
 |
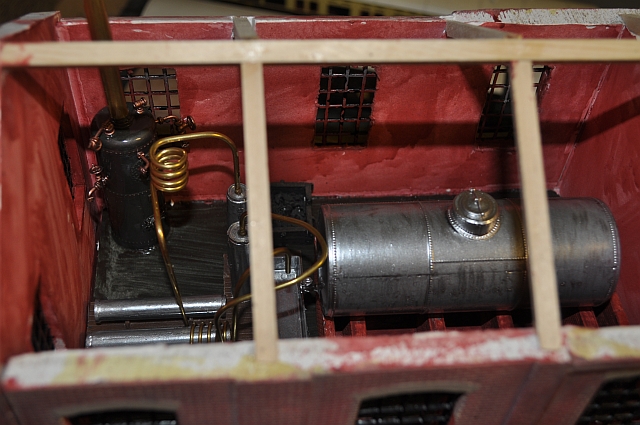
The internal workings of the rooms are now being created. On the top
floor a steam processing plant, (see left), for Pasteurisation with
storage tanks in the next room.
Then on the first floor, coagulation and drying tanks , (see right).
Finally on the ground floor a freezing and butter processing plant and
pipe work for the milk tank and churn arrivals. The rooms will have
lighting from grain of wheat bulbs so that the internal arrangements can
be seen!
Currently interviews are
being held for dairy workers and management staff!
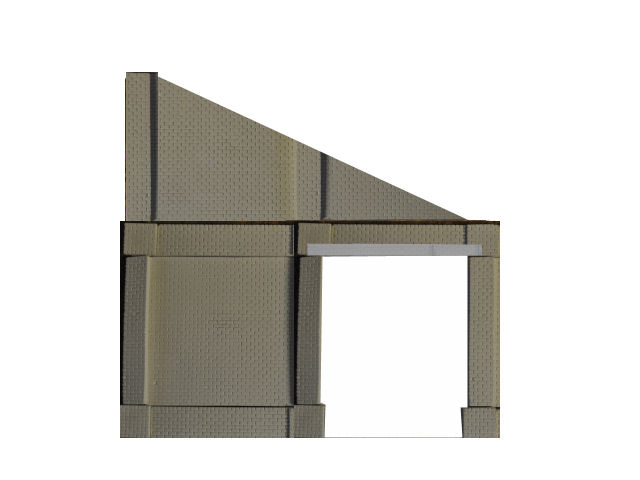
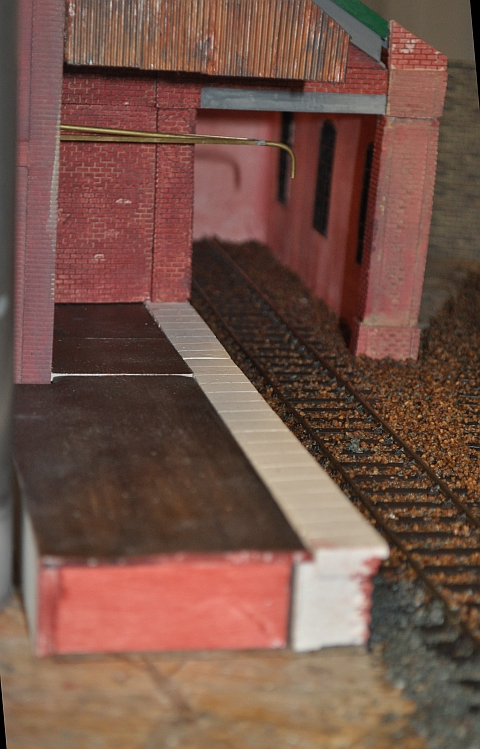
The front and back walls of the lean to have been put together and washed with dark brick and thinners. This is the first trial to see how well they fit together. As the parts are so heavy and large this part will have to be built in situ. Some adjustments to the roof will also be necessary as the front wall of the lean-to had to be modified so that the track was not too far from the platform. To create the beam over the open end I merely scratched away about three brick courses. This left a plain section that will be a 'concrete' beam.
 |
 |
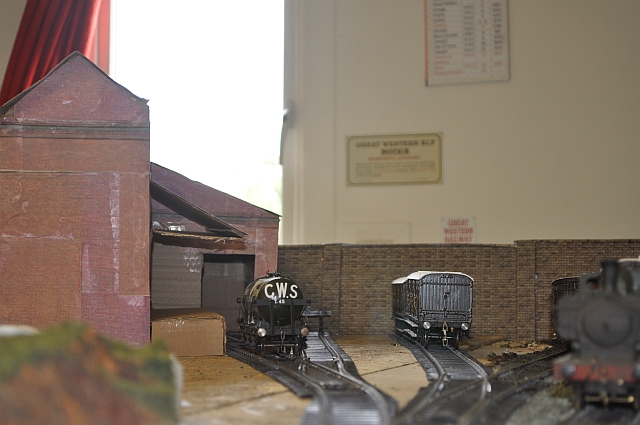
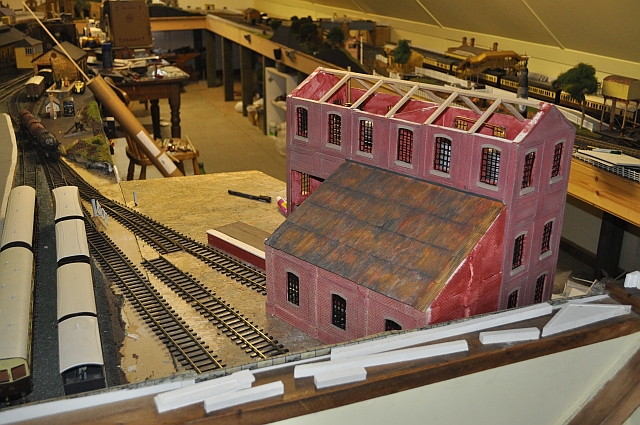
The first trials insitu the right way round. The track has been fixed in place and now the fun begins by trying to fit the sections into the available space. I have an office block on order and will need to site the storage tanks and water tower facility in this area as well.
 |
 |
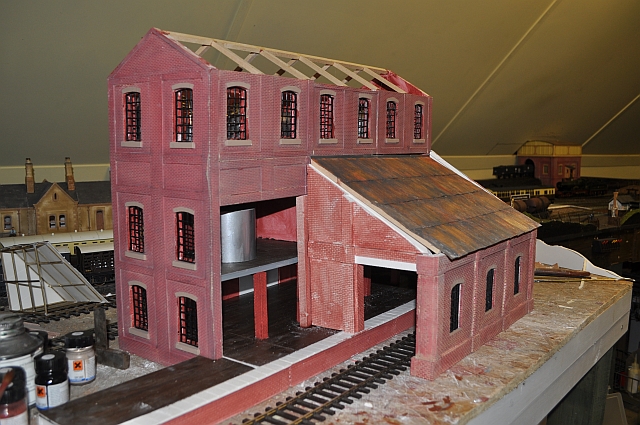
Both canopies are now in place the larger roof is still unstuck though. Placed a tube in position where the chimney will be. A small lean-to boiler room will house it. You can just make out a tank filler pipe suspended in the right hand picture. the large storage tanks are in their current position but not necessarily final place yet. the lean to can house two tank wagons.
 |
 |
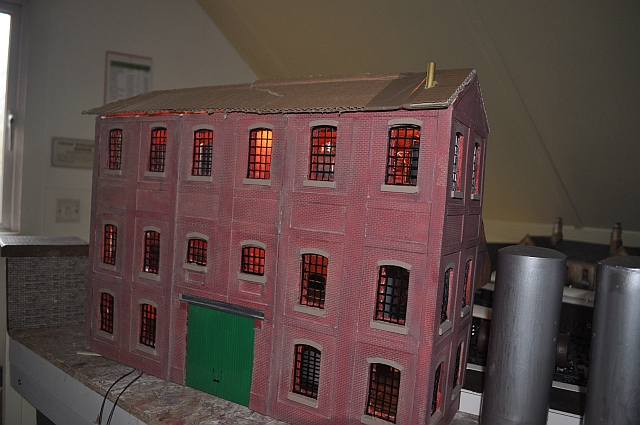
Not easy to see in daylight but the lighting for the creamery is now done and the LEDs will run from 12v source. Used 10 lights in all.
 |
With a cardboard roof on the lights are a little easier to see.
 |
 |
Perhaps a little background information about the locality and the creamery is now appropriate. Click here to see how it will all come together.
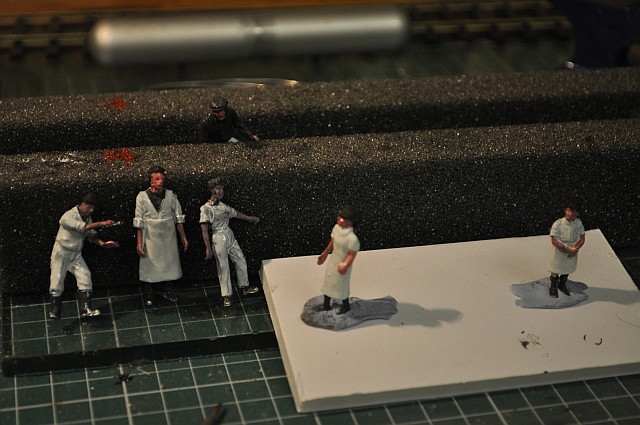
These characters are all provided by S&D models, (their Phoenix 43
sets) and I can't recommend them highly enough. Unfortunately my ability
to paint them and make them into realistic human beings usually ends up
with a group of zombie looking characters with neck problems and faces
to scare even the most well travelled of us on a dark night!
I have yet to add eyes but already it looks like a still from Michael
Jacksons Thriller video!
And to think they are all to work in the creamery. Giles, (try the link
above), has ideas on guided tours after dark but...............
 |
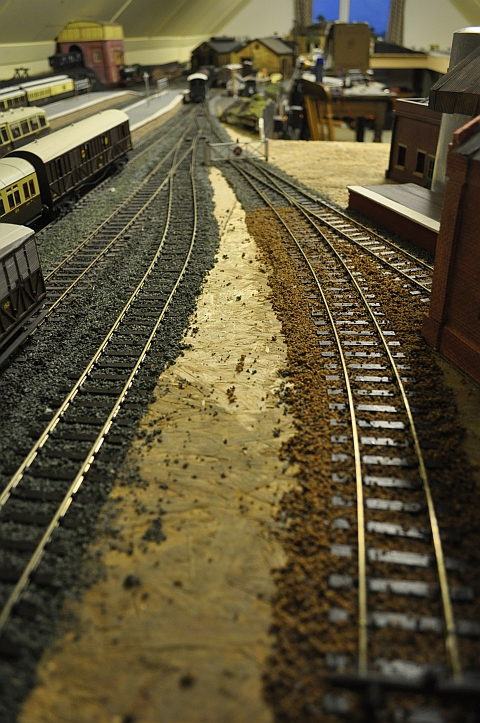
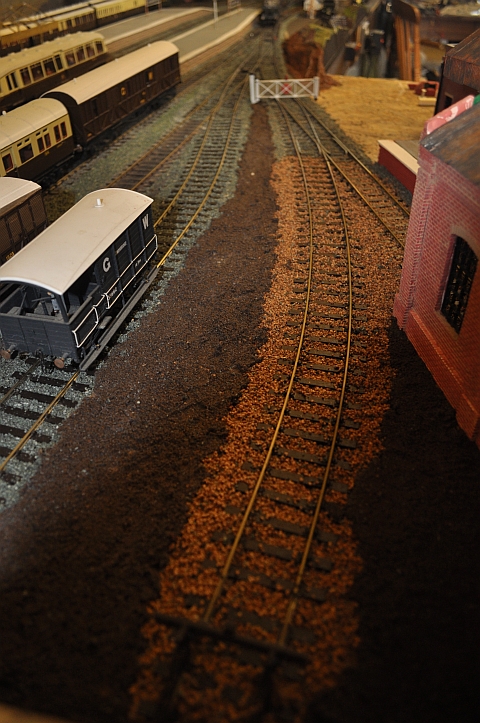
The track leading to the creamery and its associated sidings have now been ballasted. A job I hate as its long and drawn out and back aching all in one go. But this now means that when it has been dried and the grit in the wrong place has been removed, then the building can be fixed in place.
 |
 |
To hide the gaps where the side pieces were glued together I've added on drainpipes as you can see from the picture to the left. The tracks and in-between sections of the baseboard have been completed as has the small landscaped area just to the other side of the gate.
 |
 |
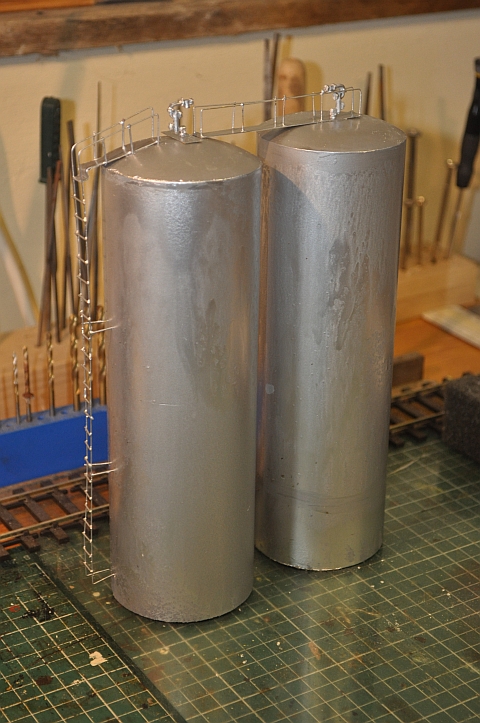
The two storage tanks have had their steps and access gantries fitted and painted so are ready to be sited. This means that they will be moved umpteen times till they look right in the right place!
 |
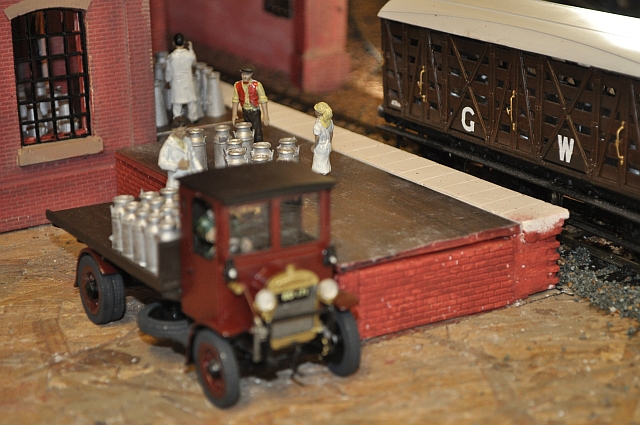
| I've just completed a Thorneycroft 4 ton lorry courtesy of S & D Models which is delivering a half load of churns to the creamery. At the moment there is a distinct lack of folk, (see left), to help unload the churns but as soon as interviews are completed there will be several folk there to assist, (see right). The office building is a skytrex model of a station building but works here as a standalone item in the yard. |
 |
 |
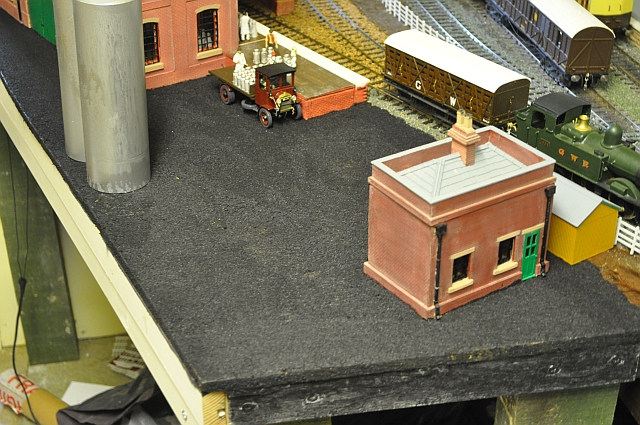
The yard floor has now been completed, using a mixture of Mars black, PVA and black tarmac scatter and slopped with water. Also the small boiler house at the back of the large building has had its chimney inserted and as the building had to cover one of the buildings windows was raised up on a brick plinth. This meant adding small steps to give access to the door. The storage tanks have moved again and as the yard is completed so they may move again. A weighbridge is on its way to complete the outside buildings and a milk float will appear hopefully in the new year!
 |
 |
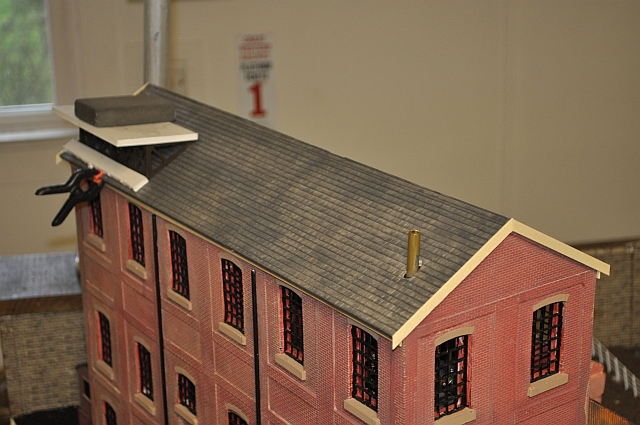
One issue that came literally to 'light' was the problem of incidental light shining through resin walls. To overcome this on the creamery roof, (which will be resin based), was to insert black lining paper between the rafters and the roof covering. This blocks out light and stops it shining through the resin layer. Even if you paint carefully there will be thin areas that show light and the lining stops this from occurring. Here you can see I've stuck cartridge paper painted black on both sides down first before attaching the roof.
 |
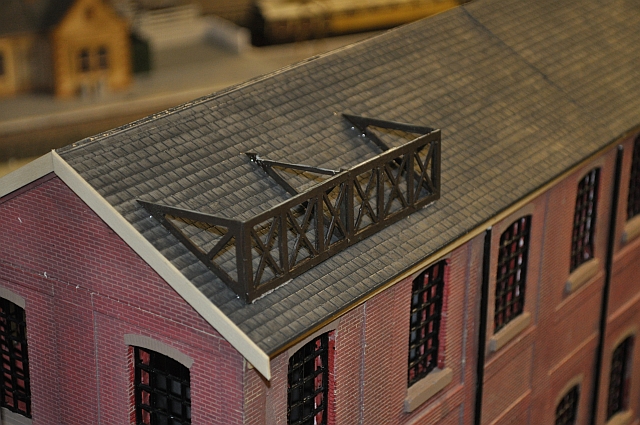
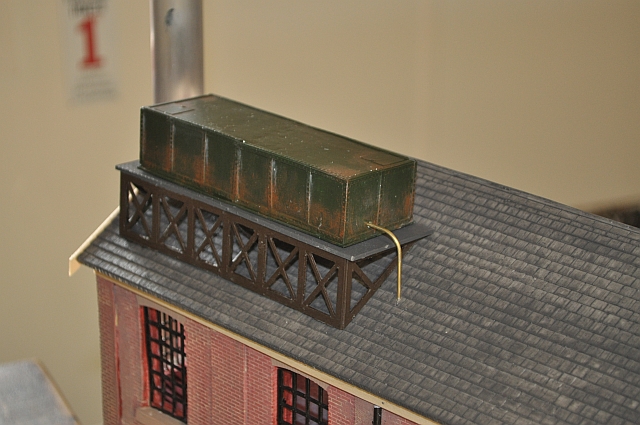
The roof tiles are now in situ and dry brushed a slate grey. The barge boards and soffits are also in place. The structure to hold the water tank on the roof has been glued in place. It is made up of two tank sections to provide seating for a double size tank.
 |
 |
The tank and its base are in the stages of paint and weathering. As it was made of two kits the tanks, made of plaster, were modified by removing the riveted section on one side to be joined together and filled so as to look like one large tank. The base was similarly treated. Weathering was applied using light rust and a touch of roof white.
 |
Here is the tank in situ. Completed, weathered and piped into the creamery below
 |
The weigh bridge and office have been finished and positioned. The retaining wall around two sides of the creamery with a gate entrance near the weigh bridge will finish off the buildings. I am in the process of constructing a milk float for local deliveries. One produced by Agenora is being used. its in limited production and comes with three crates. (searching for milk bottles though)!
 |
This is the milk float in production. Apparently its based on a 'Wales and Edwards' model. When its finished, Ernie will be driving it, (yes its the same one and he's still the fastest).
 |
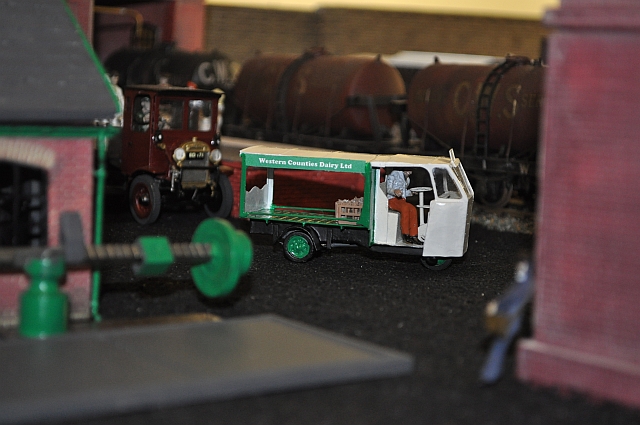
The milk float in finished condition and in the
creamery yard. Ernie is alighting from the cab ready to collect his
bottles for his early morning round of the town. The current name for
the dairy is:
'Western Counties Dairy Ltd'
The final structural items for the creamery such as the surrounding wall
and main gate will appear in due course. The ornate gates are on order.
 |
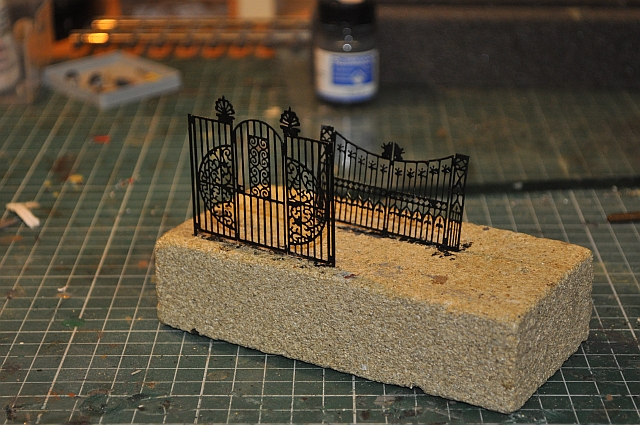
The gates arrived from Scale Link ltd. The complete gates shown in the background here looked more like garden gates and were only 3cm high at their highest point. So I decided to make up a set of gates from the rest of the bits on the fret supplied. As you can see a three part gate with finials on top created a gate of 4.5 cms high which looked much better. I will have the gates closed so they can be seen more clearly. The walls I have found at Invertrain and are double sided resin which i will be ordering shortly. It will only remain to fit a sign above the gates on the walls to finish the entrance off.
I now have all the walls for the creamery and having painted one side I put them up as shown here.
The buttresses have been doubled up back to back and glued between the wall sections. A second coat of dark brick and then grouting yellow will finish them off. The gates are in place too as shown here.
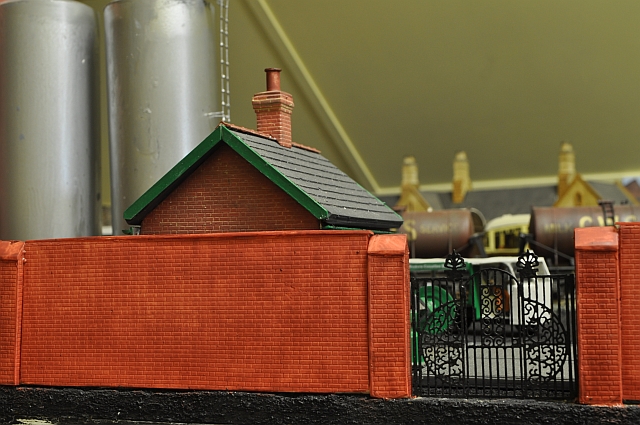
The walls just remain to be 'mortiseized' and a post-box fitted to the wall and finally the sign above the gateway and it will be completed.
 At the other end of the line I've made up a steam clean rack for the milk tankers and a discharge platform inside the goods shed shown. This will give an end to end purpose for the tankers once running in earnest begins. |